[Flutter] How to Create Simple Search Bar in AppBar

This article shows how to implement a simple search function in the AppBar.
The following is a step-by-step guide for beginners.
Goal of this project↓

Execution Environment
- DartPad
- Flutter 2.8.0
- Dart SDK 2.15.0
Base UI
Here is the base UI for this project.
This is an edited version of the counter app that is generated when you create a Flutter app.

The code is as follows.
import 'package:flutter/material.dart';

void main() => runApp(MyApp());

class MyApp extends StatelessWidget {
  @override
  Widget build(BuildContext context) {
    return MaterialApp(
      title: 'Flutter Demo',
      debugShowCheckedModeBanner: false,
      theme: ThemeData(
        primarySwatch: Colors.blue,
      ),
      home: const MyHomePage(title: 'Flutter Demo Home Page'),
    );
  }
}

class MyHomePage extends StatefulWidget {
  final String title;

  const MyHomePage({
    Key? key,
    required this.title,
  }) : super(key: key);

  @override
  _MyHomePageState createState() => _MyHomePageState();
}

class _MyHomePageState extends State<MyHomePage> {
  List<String> _list = ['English Textbook', 'Japanese Textbook', 'English Vocabulary', 'Japanese Vocabulary'];

  Widget _defaultListView() {
    return ListView.builder(
      itemCount: _list.length,
      itemBuilder: (context, index) {
        return Card(
          child: ListTile(
            title: Text(_list[index])
          )
        );
      }
    );
  }

  @override
  Widget build(BuildContext context) {
    return Scaffold(
      appBar: AppBar(
        title: Text(widget.title),
      ),
      body: _defaultListView()
    );
  }
}
About ListView.builder↓

Edit AppBar
Add Search IconButton
Add search IconButton in AppBar.

Add actions, then add IconButton
@override
  Widget build(BuildContext context) {
    return Scaffold(
      appBar: AppBar(
        title: Text(widget.title),
        actions: [ //add
          IconButton(
            icon: Icon(Icons.search),
            onPressed: () {}
          )
        ]
      ),
      body: _defaultListView()
    );
  }
Switch Search Mode
Next, add a function to enter the search mode when the search button is pressed, and exit the search mode when the clear button is pressed.
_searchBoolean
First, add _searchBoolean variable to switch the search function.
The default is to turn off the search mode, so the value of _searchBoolean should be false.
class _MyHomePageState extends State<MyHomePage> {
  bool _searchBoolean = false; //add

  //
}
onPressed
Next, to switch to search mode when the search button is pressed, make the search button onPressed as follows.
To switch the UI, setState is required.
//
        actions: [
          IconButton(
            icon: Icon(Icons.search),
            onPressed: () {
              setState(() { //add
                _searchBoolean = true;
              });
            }
          )
        ]
//
clear button
After doing so, add clear button to exit the search mode.
In other words, the default (searchBoolean == false) is to show the search button, and the search mode (searchBoolean == true) is to show the clear button.
For this switchover, make the actions as follows.
//
      actions: !_searchBoolean
        ? [
          IconButton(
          icon: Icon(Icons.search),
          onPressed: () {
            setState(() {
              _searchBoolean = true;
            });
          })
        ]
        : [
          IconButton(
            icon: Icon(Icons.clear),
            onPressed: () {
              setState(() {
                _searchBoolean = false;
              });
            }
          )
        ]
//
※This code uses the ternary operator.
The ternary operator is a method of writing with the following expression
(condition) ? (if the condition is true) : (if the condition is false)
The reason using ternary operator is that trying to branch the Widget with an if statement would require an immediate function, which is with many parentheses.
For more information on immediate function, I recommend the following site.

Also, by adding ! to _searchBoolean, the case of false is written first.
The reason for this is that I think it’s easier to understand if the default is written first.
Create Search Bar
Now it’s time to create the search bar.
The search bar is implemented by specifying a TextField as the title of the AppBar.
Create Search Bar Widget
First, create a search bar widget.
Since it is a long code, it should not be written directly in the AppBar, but written separately as _searchTextField.
Here, just use TextField() for now.
class _MyHomePageState extends State<MyHomePage> {
  bool _searchBoolean = false;

  List<String> _list = ['English Textbook', 'Japanese Textbook', 'English Vocabulary', 'Japanese Vocabulary'];

  Widget _searchTextField() { //add
    return TextField();
  }

  Widget _defaultListView() {
    //
Show Search Bar
Next, make the search bar visible.
As well as the icon button, the default (searchBoolean == false) displays the title text (in this case, Flutter Demo Home Page), while the search mode (searchBoolean == true) displays the search bar.
    //
      appBar: AppBar(
        title: !_searchBoolean ? Text(widget.title) : _searchTextField(),
    //
Edit TextField
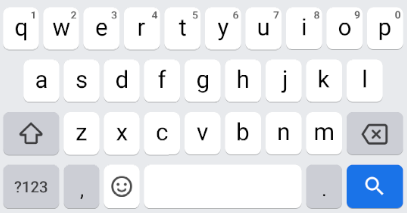
Press the search icon, tap the TextField, and type some text, then you will see the following.

This shows that the cursor is not visible because its color is the theme color.
Therefore, change the color of the cursor to white.
There are other customizations (explained in the comments).
  Widget _searchTextField() {
    return TextField(
      autofocus: true, //Display the keyboard when TextField is displayed
      cursorColor: Colors.white,
      style: TextStyle(
        color: Colors.white,
        fontSize: 20,
      ),
      textInputAction: TextInputAction.search, //Specify the action button on the keyboard
      decoration: InputDecoration( //Style of TextField
        enabledBorder: UnderlineInputBorder( //Default TextField border
          borderSide: BorderSide(color: Colors.white)
        ),
        focusedBorder: UnderlineInputBorder( //Borders when a TextField is in focus
          borderSide: BorderSide(color: Colors.white)
        ),
        hintText: 'Search', //Text that is displayed when nothing is entered.
        hintStyle: TextStyle( //Style of hintText
          color: Colors.white60,
          fontSize: 20,
        ),
      ),
    );
  }
The UI looks like this


Since I specified search in textInputAction, the keyboard blue button is for search.
You can change many other things as well.
For more information, please visit the site below.

Now, you are done editing the AppBar.
※You will see the information “Prefer const with constant constructors." It is recommended that you write const where you see that information, because it will prevent the Widget from being rebuilt.
However, in this article, it is omitted for the sake of explanation.
Please refer to the following article for more information on performance improvement by writing const.

Implementation of Search Function
Next, implement the search function.
Switch ListView
Currently, the body is set to _defaultListView, but during the search function, the ListView should be switched so that only display the list that matches the searched characters.
Create _searchListView
First, copy and paste _defaultListView to create _searchListView.
//
  Widget _searchListView() { //add
    return ListView.builder(
      itemCount: _list.length,
      itemBuilder: (context, index) {
        return Card(
          child: ListTile(
            title: Text(_list[index])
          )
        );
      }
    );
  }

  Widget _defaultListView() {
  //
Switch ListView
As well as the icon buttons and search bar, display the _defaultListView in the body by default (searchBoolean == false), and display the _searchListView in the body in search mode (searchBoolean == true).
    //
      appBar: AppBar(
        //
      ),
      body: !_searchBoolean ? _defaultListView() : _searchListView()
    );
  }
}
Search Function
In this search function, the index of the list that contains the searched characters is put into a list called _searchIndexList, which is then displayed by the _searchListView.
Create _searchIndexList
First, create _searchIndexList.
index is an int type, so make it List<int>.
//
class _MyHomePageState extends State<MyHomePage> {
  bool _searchBoolean = false;
  List<int> _searchIndexList = []; //add
//
Add onChanged
Next, add a process to put the index of the list containing the searched characters into the _searchIndexList.
This time, the process will be to change the list every time the searched character is changed.
To add processing when the TextField is replaced, add onChanged.
※If you want to process when the search button on the keyboard is pressed, use onSubmitted.
//
  Widget _searchTextField() {
    return TextField(
      onChanged: (String s) { //add
        setState(() {
          _searchIndexList = [];
          for (int i = 0; i < _list.length; i++) {
            if (_list[i].contains(s)) {
              _searchIndexList.add(i);
            }
          }
        });
      },
    //
The (String s) in onChanged makes the input character (String) a variable (s).
It uses setState to switch the UI and a for statement to process all the elements of the list in it.
※for statement: for (initial value; conditional expression; change expression) {process while conditional expression is true}
The if statement in this for statement is the process of adding index (i) to _searchIndexList if the element of the list (list[i]) contains the searched character (s).
Also, before this for statement, write _searchIndexList = []; to initialize the _searchIndexList.
Then, to initialize the _searchIndexList also when the search button is pressed, add _searchIndexList = []; to the onPressed search button.
  //
      appBar: AppBar(
        title: !_searchBoolean ? Text(widget.title) : _searchTextField(),
        actions: !_searchBoolean
        ? [
          IconButton(
          icon: Icon(Icons.search),
          onPressed: () {
            setState(() {
              _searchBoolean = true;
              _searchIndexList = []; //add
            });
          })
        ]
  //
Reflected in _searchListView
Now, reflect this _searchIndexList to the _searchListView.
First, set itemCount to _searchIndexList.length to match the number of displayed listings to the number of elements in _searchIndexList.
Then, add index = _searchIndexList[index]; to make the index in itembuilder the index you put in _searchIndexList.
//
  Widget _searchListView() {
    return ListView.builder(
      itemCount: _searchIndexList.length, //edit
      itemBuilder: (context, index) {
        index = _searchIndexList[index]; //add
        return Card(
          child: ListTile(
            title: Text(_list[index])
          )
        );
      }
    );
  }
//
Now the _searchIndexList can be reflected in the _searchListView, and the search function can be used.
Overall Code
import 'package:flutter/material.dart';

void main() => runApp(MyApp());

class MyApp extends StatelessWidget {
  @override
  Widget build(BuildContext context) {
    return MaterialApp(
      title: 'Flutter Demo',
      debugShowCheckedModeBanner: false,
      theme: ThemeData(
        primarySwatch: Colors.blue,
      ),
      home: const MyHomePage(title: 'Flutter Demo Home Page'),
    );
  }
}

class MyHomePage extends StatefulWidget {
  final String title;

  const MyHomePage({
    Key? key,
    required this.title,
  }) : super(key: key);

  @override
  _MyHomePageState createState() => _MyHomePageState();
}

class _MyHomePageState extends State<MyHomePage> {
  bool _searchBoolean = false;
  List<int> _searchIndexList = [];

  List<String> _list = ['English Textbook', 'Japanese Textbook', 'English Vocabulary', 'Japanese Vocabulary'];

  Widget _searchTextField() {
    return TextField(
      onChanged: (String s) {
        setState(() {
          _searchIndexList = [];
          for (int i = 0; i < _list.length; i++) {
            if (_list[i].contains(s)) {
              _searchIndexList.add(i);
            }
          }
        });
      },
      autofocus: true,
      cursorColor: Colors.white,
      style: TextStyle(
        color: Colors.white,
        fontSize: 20,
      ),
      textInputAction: TextInputAction.search,
      decoration: InputDecoration(
        enabledBorder: UnderlineInputBorder(
          borderSide: BorderSide(color: Colors.white)
        ),
        focusedBorder: UnderlineInputBorder(
          borderSide: BorderSide(color: Colors.white)
        ),
        hintText: 'Search',
        hintStyle: TextStyle(
          color: Colors.white60,
          fontSize: 20,
        ),
      ),
    );
  }

  Widget _searchListView() {
    return ListView.builder(
      itemCount: _searchIndexList.length,
      itemBuilder: (context, index) {
        index = _searchIndexList[index];
        return Card(
          child: ListTile(
            title: Text(_list[index])
          )
        );
      }
    );
  }

  Widget _defaultListView() {
    return ListView.builder(
      itemCount: _list.length,
      itemBuilder: (context, index) {
        return Card(
          child: ListTile(
            title: Text(_list[index])
          )
        );
      }
    );
  }

  @override
  Widget build(BuildContext context) {
    return Scaffold(
      appBar: AppBar(
        title: !_searchBoolean ? Text(widget.title) : _searchTextField(),
        actions: !_searchBoolean
        ? [
          IconButton(
          icon: Icon(Icons.search),
          onPressed: () {
            setState(() {
              _searchBoolean = true;
              _searchIndexList = [];
            });
          })
        ]
        : [
          IconButton(
            icon: Icon(Icons.clear),
            onPressed: () {
              setState(() {
                _searchBoolean = false;
              });
            }
          )
        ]
      ),
      body: !_searchBoolean ? _defaultListView() : _searchListView()
    );
  }
}
Afterword
I explained how to implement a simple search function in the AppBar.
In this project, since it is a simple search function, I implemented .contains() to check if the searched character is included.
If you want to make the search function more complex, you can work on that part.
For example, the current code is supposed to be case-sensitive, but if it is not, it can be implemented by making .contains() as follows.
    //
            if ((_list[i].toLowerCase()).contains(s.toLowerCase())) {
              _searchIndexList.add(i);
            }
    //
In the next article, I will summarize how to implement a function like Chrome’s in-page search as a more advanced version of the search function.